I usually install demos games on my computer for testing, I studied to a day may enter in the programming game area, while this day don't come, I still working with a basic programming.
When you install a lot of stuff in the windows this became a little slow (Really SLOW) and what is the better think to do? Format and install from zero.
BUT the windows have limitations on the activation key (Like I buy a car and when I need change some pieces, I need get permission of authorized to do something with already is ours), I had a lot of disappointment about windows, but i need to see the new games enter in the market and programming, for this reason (activation key) I found another way to stay with a original windows: Make a image.
Here i have a problem. When I recover the image, all my settings is lost.
So I decide make one partition to games and other to programming, but have other problem. I have program who like to use in both parts, so more one partition to put my stuff.
With the release of Windows 7 RC I decided check and make this tutorial for the people who like continue working with your computer while having time to leisure.
The first step is create a partition. You can user the
Partition Magic or other freeware. You can check
The Free Country. I not teach this part because I already have have a two partition and just resize one of. My HD is 320GB divided in order (70GB, 180GB, 70GB) all primary, formatted with NTFS. This is important when you will change the active partition.
Make sure you set the 3th partition to install the windows. After install the windows when you insert a name of user, put anyone, because after we will discard (Don't install any program. Is this part we start the settings).
To change the register I use the freeware program, is very fast to make the changes, so if you like you can download the
Registrar Registry Manager. After all make a backup of register with this program (File->Backup and Restore) if you make some mistake, you can restore the original file.
Make a look if the windows make this settings in the HD:
- Administrative Tools->Computer Management
Is very important the common data stay in the middle and the drive name with E:. If is not, in the same program you can change: click with right button in the drive and select "Change drive letter and paths ...".
Starting
I decide create the users path in the E:\Data\Users\ because all the information in the "Data" directory is used to put document, settings, etc.
In the
Windows Explorer:Make a copy of "Default" and "Public" directory in "C:\Users\" to "E:\Data\Users\"
In the
Registrar Registry Manager:
Click in Search->Search registry (Ctrl+F). In "What to look for" Leave only "Data" checked
Search to a "\Public" text and the result will come the following information below:
 Search screen
 Settings
 Change the "%SystemDrive%\Users\Public" value to the "E:\Data\Users\Public"
(Select the line, Right Button->Replace).
Make a new seach with "C:\Users\Public", select all (Ctrl+A), Right Button->Replace.The result will be as shown below
 The default comes with more information that we need, then do a search with "C:\Users\Default" then "%SystemDrive%\Users\Default" and make the replacement.The end result will be something like:
 In this part you must be careful to not replace the current User Information (we will do this later, because we're using it at the moment)
Change to the new directory:- "%SystemDrive%\Users" to "E:\Data\Users\"
- "C:\Users\*\" to "E:\Data\Users\*\"- "C:\Users" and "C:\Users\" (With nothing after) to "E:\Data\Users" and "E:\Data\Users\"
Now we can create a new account with administrator that will use to login in the new directory.
Restart the windows and select the new account (Don't use logoff).
Wait the windows create a new profile and check the directory if the user already created in the new directory.
Now you can copy the old user to the new directory
Enter again in the "Registrar Registry Manager" and change the others "C:\Users\" directory to "E:\Data\Users\"
.
Restart again the windows and enter the older user.
This time you can change all the "C:\Users" to a new directory.
Restart again the windows and select any user you like.
I advice delete the old User, because as you made a copy of the original with the new user, the new user become owner of the file, so if you want to keep the old User, you need make this changes. (Hint: when the file was copied, the read-only attribute was also copied with the new user as a owner, so when you try use some features like download, will can't save).Now we can install all the programs we wanted use in the two partitions and like still with the same information (Firefox "will see the same settings and bookmark", Adobe Reader, Flash, etc.). Don't forget make the windows update. ;)
With all basic installation, now we create the image (I will use the
Norton Ghost or a interesting program called
Hiren's, which contains a excellent programs for the computer configuration).
My first experience with Norton I lost all my data because I didn't know how to make the image, for this reason I took photos step by step to follow.
Creating the image
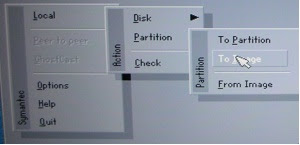
In the norton: Local->Partition->To Image

Select the HD (I used a external HD to boot, for this reason show two equals HD's)
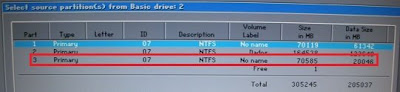
Select the 3th partition (Assuming you installed the windows and set in the third partition).
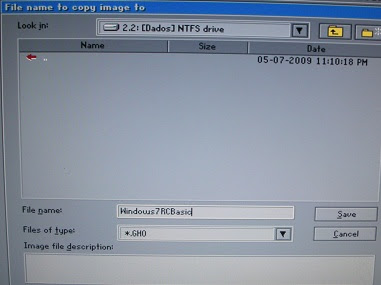
Select where you put the image (I choice the 2.2 is means drive 2, partition 2 - because the drive 1 is my boot HD and the partition 2 is my data storage)
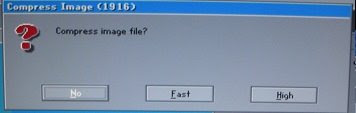
Choose the compression (For me is Fast)
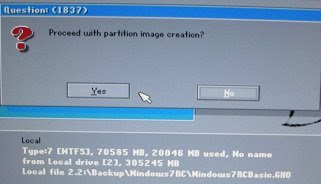
Check the information below the message and you are sure that this right, click in
Yes.
When finish, we can put the same image to the other drive:
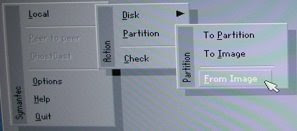
In the norton: Local->Partition->From Image
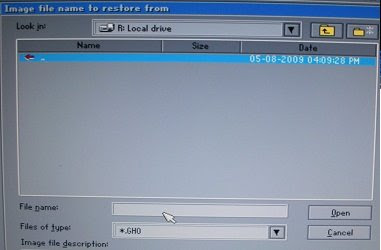
Find the image
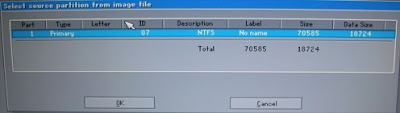
After you select the file will show this message, because in the same file can have many partitions, but we created only one. So select this one and press
OK.
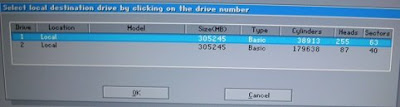
Again, my HD boot, so I'm selected the drive 2.
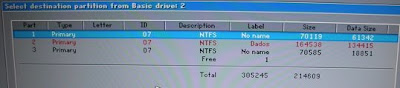
I created the image from the part 3, now i will insert the image in the part 1.
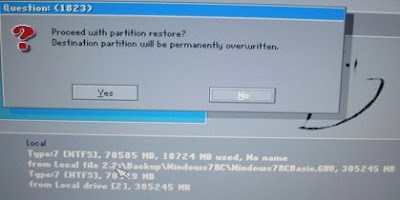
Check the information below the message and you are sure that this right, click in
Yes.
Now you can make a mess in one partition that not affect the work partition.
NOTES:- I am not responsible for ANY DAMAGE incurred from the misuse of this material or instructions contained here. Make at your own risk.
- Don't have a boot menu choice because we install the equal image an the MBR make crazy (If you see in the partition magic the information came Error #110). To change the partition you need use the Computer Management (Administrative Tools->Computer Management), select the drive you like change and in the right click select "Make partition as Active). The good part is that you just change to another partition if you want.
HintsWhen you like recover again the image, first update the windows and all the softwares you installed and create a new image again.
Have fun!


